Friday 15 June 2012

More on engine

Wednesday evening was spent chaufeurring Phil from ExtraEfi around the local roads with the laptop connected to the Megasquirt. After a good few hours driving at various speeds and loads with a few ECU tweaks along the way, the engine now sounds and revs miles better and the car now pulls like a train. I feel like a kid with a new toy again!

One minor annoyance is the rear suspension which, reading up on the subject on the LCB forums, is a fairly common occurrence on Indys and comes from the polybushes. I've raised the rear of the car this evening and have removed, cleaned up and lubed the bushes on one side of the car. I originally used copper slip for the crush tube/bush fittings but have now changed this for some Castrol red rubber grease. I should have the other side finished tomorrow.

I've been in contact with Darren from Pistonheads East Anglia to be kept up to date with regional meet ups and run outs. I've also added some of the Pistonheads livery to the Indy :)

Currently keeping an eye on the weather reports for Newark in anticipation for taking the drive over to the kit car show this sunday....

Tuesday 12 June 2012

Engine issue solved

Some lambda sensor friendly sealant has been sandwiched either side of the exhaust manifold gasket to cure an air leak. However, this didn't improve the pops and bangs through the exhaust.
With the engine idling, I sprayed some WD40 along the inlet manifold gasket area and the rpms rose briefly. Suggesting an air leak on the inlet manifold, I used some more sealant to cure the leak. Unfortunately, this didn't solve the problem either!
A compression test was carried out on the engine with all cylinders giving a reading close to 200psi.

Using a vaccum balancer on the inlet trumpets, the throttle body on cylinder four was drawing in far too much air and any attempts to adjust made little difference. Looking at this particular TB more closely, the source of the issue finally revealed itself as a bent butterfly.

As shown in the image below, both bolts should be parallel. How it got bent, I've no idea! Fortunately, I had a spare TB and this was swapped over. With the spare fitted, the TB on cylinder four balanced up in line with the other three.


I've also started looking at the polybush and crush tubes to try and eliminate the creaking suspension. So far, I've had the near side front apart and lubed the faces with some red rubber grease. With the car raised and the shock removed, this seems to have cured this particular corner of the car. I'm planning to do the other three corners before the weekend.

Hoping for good weather over the weekend so I can take the car to the Newark Kit Car Show.

Tuesday 29 May 2012

Finally road legal!

After what has felt like an eternity, the letter I'd been waiting for from the DVLA arrived today with my registration details and tax disc.


After a short run out this evening, it appears there a some things which need attention:
The suspension seems quite creaky so I plan to recheck the crush tubes and lubricate with some red rubber grease.

There are lots of pops and bangs coming from the exhaust. Mr Extra-Efi pointed out that there might be an exhaust leak around the manifold and some lamdba sensor friendly sealant should do the trick. Plus I need to check the stud bolts are torqued up correctly.
There also seems to be a rattle coming from the gearbox which goes away when the clutch pedal is pressed in. I'm wondering whether this is the clutch release arm vibrating and whether I actually have the right release bearing fitted...

Friday 11 May 2012

DVLA inspection done

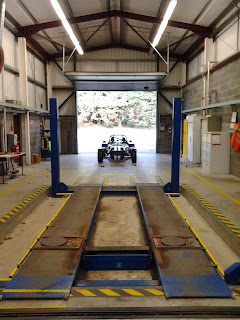
The Indy was trailered back to the VOSA test centre yesterday as its where Norwich DVLA carry out their inspections. After 30 minutes, the Indy was back at home and in the garage. All they checked was the chassis number and engine number. I should be receiving my tax and registration details in the post within a week. The wait is nearly over........

Sunday 15 April 2012

A few more post IVA additions

Seat pads made from an exercise mat fixed onto seats, the idea shamelessly stolen from someone else on the locostbuilders forums!

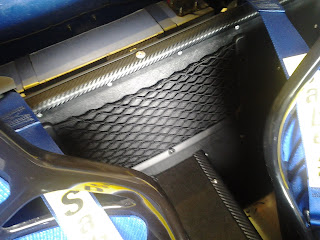
Small cargo net for storage attached to panel behind the seats.


After the drive to the MOT I noticed a few splash marks on the rear arches which is likely spray coming from the front wheels. A pair of rally mudflaps arrived this week and I found I only needed to cut down one to fit onto my front cycle wings. I used a two 4.8mm rivets per side with a stainless M5 spreader washer on the end of the rivet for support inside each wing.


Saturday 14 April 2012

DVLA inspection

I received a letter from the DVLA today asking to inspect the car on the 10th of May. Looks like I won't be able to drive the car to the Stoneleigh kit car show as I was hoping...

Saturday 7 April 2012

A few post-IVA modifications

Indicator extensions removed, should make them less likely to get snapped off (nearly snapped them myself on quite a few ocassions)

New steering wheel on

Wind deflector attached to scuttle. I was thinking I may need some sort of supports along the sides but it feels quite rigid just with seven M6 bolts holding it on along the lip in the scuttle.

I also noticed a vibration noise on the way home from the IVA test and I was worried this was coming from somewhere in the drive train. I think I've located the source of the vibration which has turned out to be the nearside side panel touching slightly against one of the front wishbone bolts. This seems to reverberate through the chassis making it sound like its coming from everywhere. For the moment I've sandwiched some foam in between and will see if this has cured it on the drive to MOT. If this does solve the vibration, I'll use the dremel on the side panel just to give a bit more clearance instead of using foam.

Thursday 5 April 2012

IVA Passed!

IAC secured! A few of the areas I was worried about turned out to be not an issue, things like fuel & filler hose markings, cycle wing bracket radii, tidiness of wiring under dash, radius of seat edges, self centering etc..

On the drive over, the speedo reading seemed to be in the right ball park but was fluctuating quite a bit so I knocked off three of the four pickup magnets on the drive shaft and changed the koso settings to suit. During the test the speed readings were then just over the minimum limit for the speeds tested on the rollers so passed overall.

One of the headlamps needed to be rotated slightly, a 10 second job , so this was passed.

The emissions failed to begin with after a CAT test but after I pointed out the engine age is 1994, the emissions were retested using the Non-CAT test levels and passed which was a massive relief for me!

The whole process took about three and a half hours, I felt very nervous to begin with but the examiner was excellent and soon made me feel as ease.

I've since been to Norwich DVLA who say they need an MOT certificate which conflicts with everything I've read about the registration process. Frustratingly, I was at an MOT center last week but deliberately didn't put the car through a full MOT to AVOID complications with the DVLA. On the plus side it gives me another opportunity to drive the car legally as this MOT is a required test. At least the ball is now rolling and I'll just have to be patient for my registration plates.

I enjoyed the drive to and from the IVA test and I'm still grinning....

Few photos from the day. For some reason my camera phone makes the blue on the car really stand out.


Funnily enough, a lot of the IVA trim has somehow fallen off and my steering wheel now says OMP, I'm sure it used to say Ford.....

Sunday 1 April 2012

Silencer bobbin continued

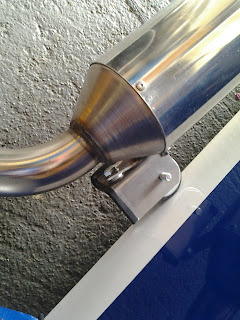
New bracket made to support the back end of the silencer using some stainless plate, the edges covered in U trim. Just need the M10 fine nuts to arrive so I can finish this off.


Car given a polish today ready for IVA on thursday

Friday 30 March 2012

Silencer bobbin revisted

For the silencer mount, I'd originally used a renault exhaust bobbin but I found that the silencer tends to twist round due to vibrations from the engine (making the exit closer to the ground). To get round this, I've bought a rover bobbin which is much more solid. The mounting brackets have been modified this evening and given a coat of my favorite paint, POR15, ready for assembly tomorrow. Once thing I didn't realise is that the bobbin's threads are M10 fine and I don' have any suitable fine threaded nuts to use so these have been ordered this evening. Comparison between both mounts shown below.


Thursday 29 March 2012

Garage checks

I arranged for the Indy to be taken to a local MOT center this afternoon using Classic Collections (great service!) so that emissions, headlamp alignment and brakes could be tested.

All in all a good result, the brakes were fine even though I had some reservations since the discs, pads and shoes are all new and haven't been given a chance to be bedded in. I'd taken the boot panel off before getting the car onto the transporter so that the handbrake could be adjusted if needed but, in the end I didn't need to adjust anything.


The headlamps needed a little adjusting but ok now.

The main area I'm really relieved about is the emissions. The limits for my car based on a 1994 engine age are CO <= 3.5% and HC <= 1200. With the engine nice and warm, my results were 1.6% CO and approx 950 for HC.


Wednesday 28 March 2012

Aeroscreen finished

I finished off the aeroscreen this evening using my new bending device for the edges. The aeroscreen is based on the MAC#1 style flyscreen, the reason I made my own is MAC#1 didn't have any screens in stock when I called (probably shouldn't have told them I was building an Indy!)

The screen will stay off until after the IVA test so that I don't need to worry about the screens radii during the test. I have noticed that the centre mirror isn't far enough back to clear the screen so I'll probably put some bends in the mirror's stem when the time comes rather than drill more holes in the scuttle to move it's position.

Sunday 25 March 2012

Bending device

I spent a couple of hours today making a bending/folding machine so I can make bends in the aeroscreen. This is made up a of a few sections on angle iron, a handful of bolts and a couple of hinges. The whole lot cost me all of £2.69 for the hinges, the bolts I had lying around in the garage and the angle sections were originally holding up my old fence!

First test piece below, an off cut of 4mm acrylic bent cold. I'm pleased with the quality of the bend and how easy it was to achieve. There are some surface scuff marks which were transferred off the faces of the angle iron so these have been rubbed smooth with some grit paper and given the whole lot a coat of paint.

Next I tried an off cut of 6mm thick polycarbonate (the same thickness as I bought for the aeroscreen). This started to tear at each end of the fold so I either need to go for a smaller bend angle or apply some heat to help, although I've read that this can cause the heated area to become cloudy due to moisture. More testing required...

Thursday 22 March 2012

Headlamp adjustment

I'd set the headlamps up once before but wasn't confident on the alignment so I rechecked them this evening on dipped beam using a spirit level and marking up positions on the garage. A few minor adjustments later and I think they're set up ok.


I've bought a heat gun which I'm planning to use to help make some bends in the lexan for the aero screen. I've read that polycarbonate can sometimes go cloudy during heating up due to moisture so I intend to use the heat gun on some test pieces first to see what happens. I've also found some plans online to make a brake from a few sections of angle iron which I'll use for bending the lexan, job for the weekend...

Saturday 17 March 2012

New fuel regulator

I made a simple bracket to mount the Webcon fuel regulator, both of which are now on the car. I took the gauge off the old regulator to keep an eye on the pressure and installed this inline with the hose to the fuel rail.

I've started the engine just as a check but I've not yet set the pressure. Job for tomorrow....

Dashboard revisited

Something that had been bothering me is that the dashboard flexes a fair amount when the switches are pressed. To give the dash a bit more support I glued a length of aluminium to the back of the dash as shown below.


The circular cut out on the end locates onto a plastic peg thats bolted into the gearbox tunnel top panel. After putting everything back together, I pushed a few of the savage switches and the dash has a much more solid feeling to it.

Whilst I had the tunnel top panel off, I took a few photos of the seat belt bracket mounts for showing to the IVA examiner if he asks to see them.

Thursday 15 March 2012

Couple more jobs

I should have done this ages ago which is to check the radius of the side panel's bottom edge. This is greater than 2.5mm so I don't need to worry about adding any hockey trim along the edge to comply with the IVA radius requirement. Whilst under the car I noticed the two lowest bell housing nylocs had next to no thread protruding through so I changed the bolts for some longer ones and added some thread lock for good measure. I'm not sure why I would have used short bolts in the first place but I'm glad I noticed before I got to the IVA test.
Whilst under the car I also noticed another puddle of coolant. I checked the usual culprits which are the silicone hose connections and found these to be dry. The leak turned out to be coming from the koso water temp sensor I'd fitted to the bottom of the thermostat housing. Getting the spanner on, the sensor felt quite loose so this has now been tightened up. I'll be keeping an eye on this over the weekend for more leaks.

I've finished a bracket for the new fuel reg and this has just been given a coat of POR15 so should be dry tomorrow evening ready for mounting on the car.

Tuesday 13 March 2012

Getting ready for IVA

I received a call from the Norwich test centre last friday and have booked the car in to be tested on April the 5th.

I'd heard mixed reports on using U trim and a nut cover on the rear seat belt brackets and that these should be covered with a proper seat belt buckle cover instead for IVA. This is a job I'd been putting off as I'd used Unibond Extreme Repair glue and was worried that any attempts to remove the U trim would end up with the trim breaking off in bits and leaving the belt bracket looking like a mess. Anyway, I can confirm that this glue isn't really up to much as the trim and nut covers came off really easily.
Stealing someone else's method from the LCB forum, I bought some Pajero bracket covers and attached these using cable ties.


I'm not 100% sure whether or not I needed a fuel cap tether since the key cannot be removed from the filler cap when the cap is removed. However, since this is an easy job to fit the tether, I put one on tonight using some soft strand wire and crimps normally used for making pike fishing traces. I made it short enough so that the wire doesn't get caught up when locking the filler cap back on.


I've bought a new fuel pressure regulator from Burton Power. The reason behind this is that the pressure setting on my current type of regulator can sometimes drift after a period of time and I figure its best to avoid the problem before it occurs. I just need to make up a new bracket to support the new Webcon reg before connecting it up to the hoses and locking off the pressure setting.

Saturday 25 February 2012

Manufacturers plate

Four months since last update, the main reason for which is explained below....

There are only a couple of jobs left to do, one of which being fitting the manufacturers plate
.
The manufacturers plate is a requirement of the IVA test and has to show the VIN number and the kit car manufacturer, which in my case is MK Sportscars.
I ordered this plate directly from MK as I thought it would look neater than my attempts at stamping my own. When you order something in October, you usually expect the item to turn up in the same year. But after four months of waiting, numerous phone calls and emails to MK chasing up the delivery and still no sign of it and being £20 worse off for the experience, I got fed up with them so ended up sourcing one elsewhere.

Here is the plate I had made, I'm really pleased with how it looks.


Now the manufacturers plate is done, I've sent off the IVA forms and the payment made, just waiting the hear from the test center with some proposed dates. Currently feeling a little nervous and quite excited at the same time!

Misc jobs in no particular order:

The IVA test requires a full tank of fuel so I've been filling up a 5 litre can from the petrol station on my way into work and transferring this in to the indy when I get home. Upon opening the garage door one night last week I walked into a waft of petrol fumes and a puddle under the tank. This turned out to be the thread seals on the pre-pump filter which has now been corrected. After fixing this, the tank was brimmed yet more petrol ended up on the floor, this time for another reason - seems my breather hose isn't high enough. Unfortunately I hadn't any more 8mm hose so I've ordered some more and plan to sort the breather out over the weekend.

I received an OMP steering wheel boss for christmas and have since bought an OMP Trencento wheel from YBracing. This will be installed after the IVA test.

I've also bought some polycarbonate sheet which I'll use to make an aeroscreen.

The engine had developed a slight misfire and it turned out it was dropping the crank signal every so often. After talking to Phil at Extra-Efi again, we identified the tacho to be the main cause. Phil did explain what was happening but I can't claim to understand it! - something to do with earths... A small module which connects between the Megasquirt ECU and the tacho was installed and this resolved the missing crank signals and the engine is now running smooth again.

I bought a 100mm polystyrene ball used for modelling purposes and have been using this in the evenings to check radii over the car and add trim where needed. So far, all I've needed to do is add some U trim to the holes in the side panels where the front wishbones pass through.